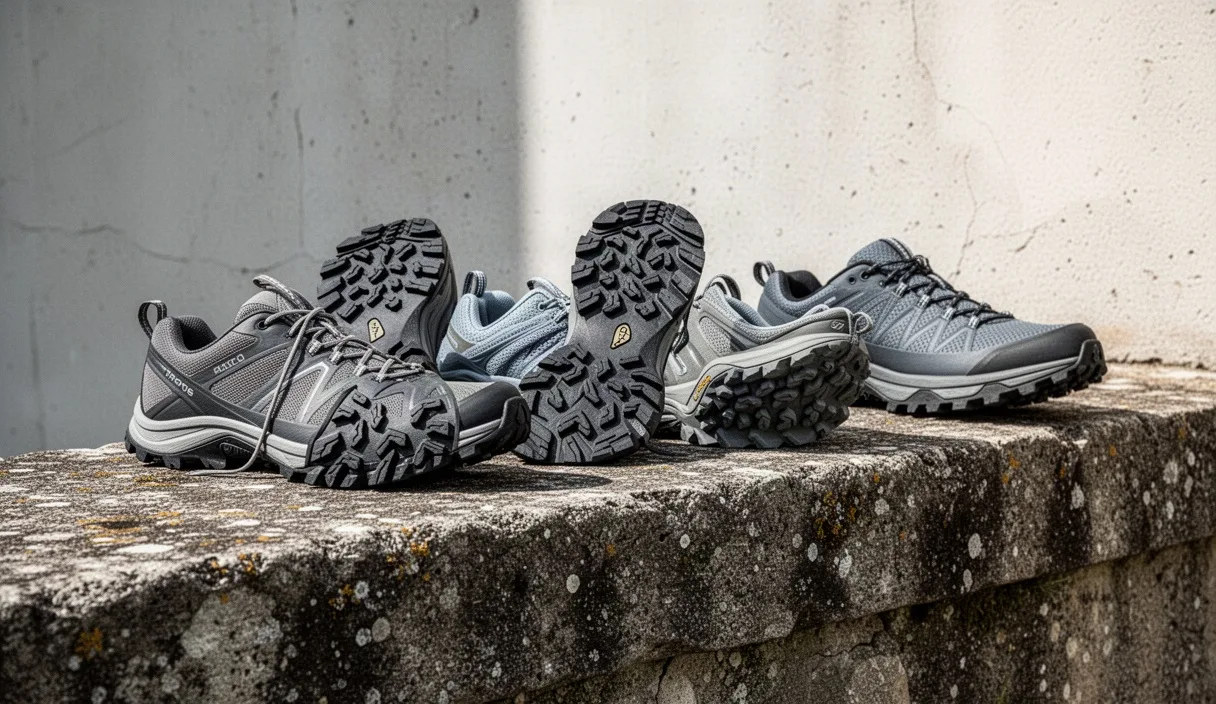
When people walk into our shop with a fresh set of poles in hand, the first question they usually ask us is whether they can wear their trusty mountain boots. It is a natural thought. If you are walking out on dirt trails, forest tracks, and gravel ridges, heavy hiking boots seem like the safest bet. Yet after twenty minutes on the trail, many walkers find their shins aching, their feet slapping the ground, and their natural rhythm ground to a halt.
Nordic walking changes the way your body moves across the ground. Because your poles propel you forward, your stride lengthens slightly, your hips rotate through each step, and your feet work through an exaggerated, rolling motion from heel to toe. The footwear you pick needs to work with that rolling motion, not fight against it. We want to walk you through exactly what to look for on the shelves so you find a pair that keeps your feet happy for miles.
Why Stiff Hiking Boots Hinder Nordic Walking Form
Traditional hiking boots are built like miniature tanks, and for good reason. If you are carrying a forty-pound backpack over jagged scree, you need a rigid shank made of steel or hardened nylon running through the midsole to prevent your foot from wrapping around sharp rocks. That rigidity locks your foot into a flat platform. In mountain trekking, you pick your foot up and set it down fairly flat, letting the boot take the strain of the uneven terrain.
Nordic walking demands the exact opposite movement. A proper Nordic stride relies on a pronounced heel strike, followed by a continuous roll through the midfoot arch, and finishing with an active push-off from the ball of your foot and the big toe. When you wear a boot with a stiff shank, your foot cannot roll. Instead of rolling smoothly, the sole pivots over the heel and slaps down against the dirt. This levering action places heavy stress on your tibialis anterior, the muscle running down the front of your shin, which quickly leads to painful shin splints.
Heavy leather uppers also limit the movement of your ankle joint. In Nordic walking, your ankle needs to flex forward freely to allow the back leg to extend fully as you push through the poles. If an ankle cuff blocks that forward travel, your stride becomes choppy and short. You end up working twice as hard to maintain a modest pace, fighting the weight and stiffness of your footwear with every single push.
The Importance of Sole Flexibility and Cushioning
To let your foot roll the way it wants to, your shoe needs longitudinal flexibility. When you pick up a shoe in the store, grab the heel in one hand and the toe in the other, then bend it. The shoe should bend easily at the ball of the foot, right where your toes hinge. If it resists your hands, or if it bends dead in the middle under the arch, put it back on the shelf. Midfoot bending strains the plantar fascia, while zero bend tires your calves.
At the same time, you do not want a completely flimsy shoe that twists like a wet dishcloth. You need torsional stability, which prevents the shoe from twisting sideways when you step on the edge of a rut or an exposed tree root. Look for shoes that flex forward easily but show firm resistance when you try to twist the heel and forefoot in opposite directions. A light TPU cradle or a dense EVA rim around the midsole usually provides this balance without adding excess weight.
Cushioning is the second piece of the puzzle. Because Nordic walking involves an energetic heel strike, the rearfoot cushioning must absorb repeated impacts on hard-packed soil. A heel stack height between 24 mm and 30 mm, paired with a moderate heel-to-toe drop of 6 mm to 10 mm, gives most walkers the right geometry. A drop within this range eases the strain on your Achilles tendon as your leg trails behind you, while keeping you low enough to the ground to feel stable.
| Shoe Type | Sole Flexibility | Average Weight (Per Shoe) | Best Suited For |
|---|---|---|---|
| Rigid Backpacking Boot | Very Low (Stiff shank) | 650 g to 850 g | Heavy loads, off-trail rock scrambles |
| Mid-Weight Day Hiker | Moderate to Low | 480 g to 600 g | Rocky hill walks, slow paces |
| Trail Running Shoe | High at ball of foot | 280 g to 360 g | Mixed dirt, gravel, rolling singletrack |
| Nordic Walking Shoe | High at ball, stable heel | 310 g to 390 g | Gravel trails, park paths, packed dirt |
Low-Cut Shoes versus Mid-Ankle Support
For most Nordic walkers on maintained dirt paths and park trails, a low-cut shoe is the ideal choice. Low-cut collars stop beneath the malleolus (the ankle bone), giving the joint full freedom to flex forward and back. This freedom helps you achieve the long, rhythmic stride that makes pole walking such an effective full-body workout. Low-cut shoes also shed between 100 and 200 grams per foot compared to mid-cut styles, and saving that weight at the end of your legs saves a noticeable amount of energy over a five-mile loop.
Mid-cut shoes still have a place on the trail, however. If your routes take you through loose shale, deep gravel, or overgrown meadows, a mid-height collar keeps gritty debris, pine needles, and burrs from tumbling inside your socks. Walkers who tackle steep, uneven ground in wet weather often appreciate the extra barrier against mud. Some walkers also find that a padded collar resting against the lower shin provides pleasant sensory reassurance on rougher descents.
It is worth noting that while a mid-cut shoe provides stability against scrapes and stops debris, it cannot fix structural joint issues. If you have chronic ankle instability, frequent sprains, or recurring tendon pain, please talk with a podiatrist or physical therapist before heading out. They can evaluate whether you need specific supportive insoles, targeted balance exercises, or a particular heel counter rather than simply relying on a taller boot collar.
Outsole Tread Patterns for Mixed Dirt and Gravel
The rubber underneath your foot determines how much power transfers from your legs into the trail. When you walk with poles, you push backward against the ground with your toes on every stride. A flat road-running sole will slip on dry dust, loose pea gravel, or slick mud, causing you to waste muscular energy trying to keep your balance.
Look for an outsole with multi-directional lugs that measure between 3 mm and 5 mm deep. Lugs deeper than 5 mm are meant for thick highland bog mud; on hard gravel, tall lugs can feel squirmy underfoot and wear down quickly. Lugs shallower than 3 mm may slide on slick dirt paths. The spacing between the lugs matters just as much as the depth. Wide spacing lets mud flick off the sole as the shoe flexes, while tightly packed patterns tend to collect mud until the sole becomes a slick, flat pad.
- Heel Braking Chevrons: Look for reverse-facing lugs along the rear edge of the heel. These dig into the earth to prevent slipping when you walk down steep gravel tracks.
- Forefoot Propulsion Claws: Look for forward-facing lugs under the ball of the foot and toes. These grip the ground as you lever forward for your push-off.
- Perimeter Stability Lugs: Broader, flatter rubber blocks along the outer edges of the sole provide stability during lateral weight shifts.
- Rubber Density: A medium-density carbon rubber blend offers a balanced lifespan. Soft, sticky rubber wears down rapidly on crushed limestone paths, while hard rubber slips on damp river rocks.
Waterproof Membranes versus Breathable Mesh
Walkers often ask if they should always buy the waterproof version of a shoe. Waterproof lining membranes, such as Gore-Tex or proprietary brand equivalents, use microscopic pores that keep liquid droplets out while allowing water vapor to pass through. They keep your feet completely dry when you walk through wet morning grass, splash through shallow puddles, or exercise during steady autumn drizzle.
The catch comes with breathability and drying time. In temperatures above 20 degrees Celsius (68 degrees Fahrenheit), or during fast workouts, your feet sweat heavily. A membrane slows down the evaporation of that sweat. Moisture gathers inside the sock, softening the skin of your foot and making you far more prone to blisters. Furthermore, if water splashes over the low collar of a waterproof shoe, the membrane traps the pool inside like a rubber bucket. It can take up to two days for a lined trail shoe to dry at room temperature.
If you primarily walk in warm, dry weather or stick to paths where water drains quickly, an unlined, breathable mesh shoe is usually the healthier choice. Mesh allows air to flow through the forefoot with every step, keeping your skin dry and cool. If a mesh shoe gets soaked in a sudden downpour, it will often walk itself dry within an hour of brisk movement. Reserve waterproof models for cold, slushy winter days, wet grass, and rainy autumn outings.
Fitting Shoes for Downhill Walking Room
A shoe that feels fine while sitting on a bench can cause black toenails after two miles of downhill walking. When you walk downhill with poles, gravity pulls your body forward, and your foot naturally slides toward the front of the shoe with every heel strike. If your toes touch the front bumper, the continuous micro-impacts will bruise the nail beds and leave you hobbling.
Always shop for trail footwear in the afternoon or evening. Your feet flatten and swell over the course of the day, gaining up to 8 percent in volume after hours of standing and walking. Bring the exact socks you plan to use on the trail, preferably wool-blend or synthetic hiking socks with dense padding under the heel and forefoot. Cotton socks should stay in the drawer, as cotton absorbs moisture, bunches up, and creates friction hot spots.
Once the shoe is laced, stand up and shift your weight entirely onto one foot. Feel for the space between the tip of your longest toe (which is often your second toe) and the end of the shoe. You need a solid thumb-width of clearance, roughly 12 mm to 15 mm. Your heel should sit snugly inside the heel cup without slipping up and down as you rise onto your tiptoes, and the sides of the forefoot should rest comfortably against the mesh without bulging outward.
Testing Your Fit on an Incline
Find an incline board in the shop, or stand on a steep set of stairs with your toes pointing down toward the bottom step. Lean your weight forward into the balls of your feet. Your toes should not tap the front of the shoe box. If they hit the front, go up a half size or try a model with a broader toe box shape.
Using the Heel-Lock Lacing Technique
If your toes have plenty of space but your heel still slips up and down, you do not necessarily need a smaller shoe. You can use the extra set of eyelets near the top collar to tie a heel lock:
- Lace the shoe normally up to the second eyelet from the top.
- Thread each lace straight up on the outside into the top eyelet, creating a small loop on each side of the collar.
- Cross the lace ends over your tongue and thread each end through the loop on the opposite side.
- Pull the laces down and backward toward your heel to cinch the loops snugly against the collar.
- Tie your standard bow knot. This pulls the heel counter securely against the back of your foot, preventing forward slippage on downhills without squeezing your forefoot.
Common Mistakes to Avoid
Over the years, we have seen walkers run into the same handful of footwear problems. Avoiding these missteps will save you both money and trail discomfort:
- Choosing road shoes with smooth soles: Pavement running shoes feel soft in the shop, but their smooth outsoles slip quickly on dry dust and damp grass, forcing your hips to work overtime to keep you upright.
- Buying your everyday shoe size: Trail footwear almost always requires a half size or full size larger than casual city shoes to allow for foot spread and descents.
- Switching straight to zero-drop shoes: Ultra-flat shoes place high demands on your Achilles tendons and calf muscles during a full Nordic stride. Transition gradually if you choose to explore low-drop footwear.
- Ignoring worn-out midsoles: Foam breaks down long before the rubber tread wears smooth. If your shoes have carried you for roughly 500 miles, the cushioning has likely collapsed, even if the upper looks clean.
Taking Your Next Steps
To find your ideal pair, take a look at the trails you walk most often. If your routes consist of canal paths, crushed gravel, and gentle park loops, start by trying on low-cut trail runners with moderate 3.5 mm lugs and a breathable mesh upper. If you walk through cold, dew-soaked meadows or rocky tracks, look toward a lightly structured, water-resistant trail shoe with a stable heel counter.
Head to a local outfitter late in the day with your walking socks. Pull the factory insoles out and stand on them on the floor to make sure your toes do not spill over the edges. Lace the shoes up, test them on a downward slope, and walk around the shop using your natural heel-to-toe stride. When the shoe bends naturally with your foot and leaves your ankles free, your poles will do their job, and you can focus entirely on enjoying the fresh air.