When you take up Nordic walking, the bottom of your pole might seem like a small detail. Most poles come in the box with a pair of thick rubber feet slipped over sharp metal spikes. Many people we meet in the shop keep those rubber feet on for months without thinking twice, or they pull them off on the first day and lose them in the grass. Choosing the right tip is not just about keeping the noise down, though that is a nice bonus. The tip controls how much power you can push through your arms, how your shoulders feel after five miles, and how safely you can grip the ground under your feet.
Every surface you walk on asks for a different kind of purchase. Hard asphalt behaves nothing like loose gravel, and a wet wooden bridge calls for a completely different approach than a dry forest trail. In this guide, we walk you through the mechanics of rubber asphalt paws versus carbide metal spikes. We will show you how to look at the ground ahead of you, swap your tips without fumbling, and set the angle so your poles work with your body instead of fighting against it.
Anatomy of Nordic Pole Tips
To understand why we switch between surfaces, it helps to look at the business end of your pole. The base of a Nordic walking pole is built around a plastic ferrule that bonds directly to the lower shaft. Pressed into the center of this plastic mount is a small, extremely hard spike made of tungsten carbide. This metal spike sits recessed or exposed, depending on whether you have an active basket attached. Carbide is used because ordinary steel wears down within a few dozen miles on rock and road grit. Tungsten carbide stays sharp for hundreds of miles, resisting abrasion and scratching into hard surfaces.
The rubber asphalt paw, often called a boot or pad, is a removable slip-on or hinged cover made from vulcanized rubber compounds. Unlike a flat trekking pole tip, a Nordic walking paw has an asymmetrical, rockered profile that looks like a miniature running shoe. The interior of the paw has an internal bore sized to grip the ferrule firmly by friction, and higher-grade paws include an internal steel reinforcement washer. This little metal washer stops the carbide spike from punching through the bottom of the rubber when you put your full body weight into a push.
The following table shows how these two tip parts differ across key design points:
| Feature | Tungsten Carbide Spike | Rubber Asphalt Paw |
|---|---|---|
| Primary Material | Sintered tungsten carbide metal | Vulcanized synthetic or natural rubber |
| Base Shape | Pointed cone, concave claw, or crown | Asymmetrical, rockered wedge boot |
| Internal Reinforcement | Solid pressed metal insert | Embedded steel plate or washer |
| Weight Per Pair | Roughly 18 to 28 grams (integrated) | Roughly 68 to 110 grams |
| Primary Function | Penetration and bite on soft or textured ground | Friction and vibration damping on hard surfaces |
The relationship between these two pieces defines your stride. The metal tip gives the pole its structural bite, while the rubber paw acts as an adaptor for human-made surfaces. Knowing what is inside the rubber helps you spot why cheap replacement paws fail so quickly: without that internal washer, a carbide spike will bore straight through soft rubber in less than ten miles of brisk walking.
Why Rubber Paws Belong on Pavement
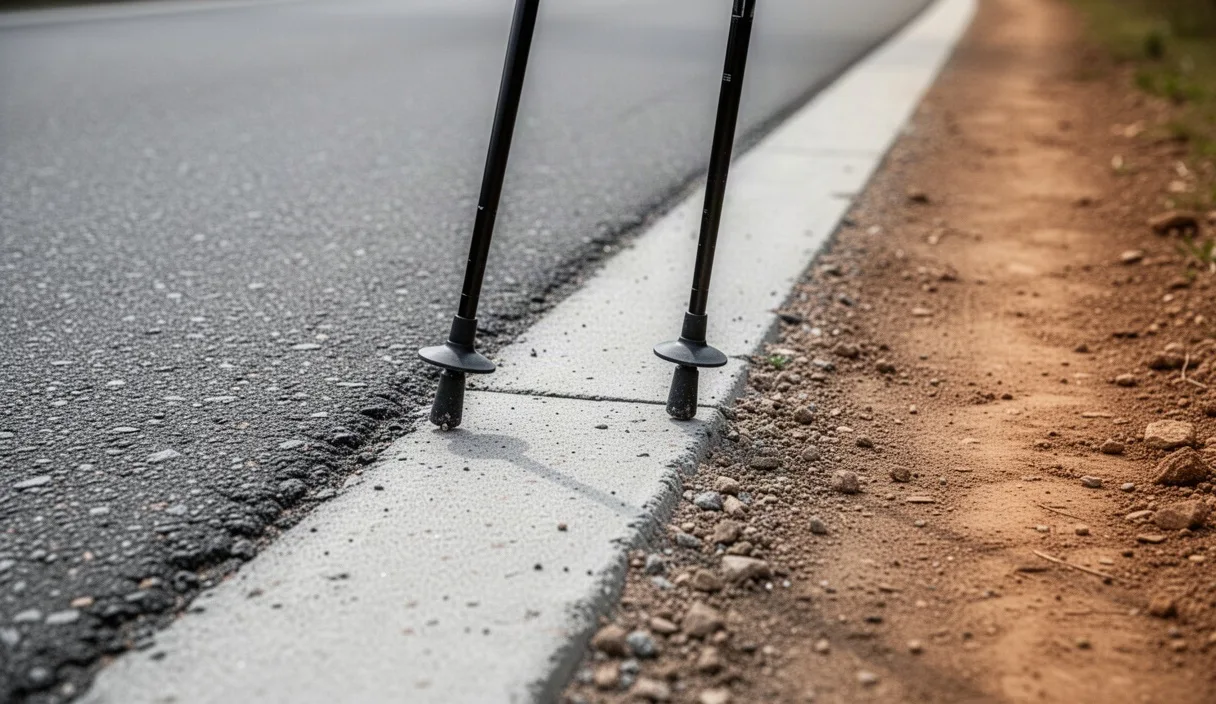
When you walk on tarmac, concrete, or brick pavers, you need friction rather than penetration. A bare carbide spike cannot pierce asphalt. Instead, it skitters across the surface with an ear-piercing click, slipping backward just when you want to propel yourself forward. The rubber paw spreads your downward force across a patch of textured rubber roughly two inches long and one inch wide. As you plant the pole behind your hip line, the rubber bites into the microscopic rough texture of the pavement, giving you solid purchase to lever your body forward.
The second big reason is shock absorption. Every time a pole strikes concrete, a shockwave travels straight up the carbon fiber or aluminum shaft into your wrist, forearm, elbow, and shoulder. Over an hour-long walk at 120 strides per minute, your arms take several thousand strikes. Bare metal against stone sends harsh vibrations into your joints that can irritate tendons over time. A dense rubber paw acts like a mini shock absorber, muting the harsh snap of each strike before it reaches your arm.
Finally, there is common courtesy and preservation. Bare carbide tips leave visible white gouges on decorative flagstones, scratch wooden boardwalks, and chip residential paving. They also make a rhythmic, metallic tapping sound that can grate on you and anyone walking with you. Slipping the rubber paws on keeps your neighborhood walks quiet and protects civic paths from premature wear.
Traction Benefits of Carbide Metal on Dirt
The moment you step off pavement onto a packed dirt path, woodchip trail, or field, rubber paws turn into a liability. On loose or soft ground, rubber pads cannot find enough surface friction. The smooth bottom slides over fallen leaves, slips on loose pea gravel, and clogs with wet soil until it feels like walking on slick plastic. Leaving rubber paws on dirt forces you to grip the handles tighter, which tenses your neck and ruins the relaxed arm swing that Nordic walking is all about.
Carbide tips shine on natural terrain because they rely on penetration. The narrow point concentrates all the downward force from your arm onto a pinpoint spot measuring less than a quarter of an inch. That intense pressure drives the tip directly into topsoil, sand, compacted gravel, or decaying leaves until it reaches solid ground beneath. You get an immediate, rock-solid anchor that will not slide backward as you drive through your arm extension.
Carbide metal also handles seasonal challenges that would stop rubber in its tracks:
- Frozen winter ground: When trail dirt freezes solid, rubber simply bounces off. A sharp carbide tip fractures the icy crust and holds steady.
- Verglas and packed snow: On cold mornings with patches of black ice on trail crossings, carbide bites where rubber behaves like an ice skate.
- Loose pine needles: Needles act like ball bearings under rubber. The metal spike punches through the carpet of needles to anchor in the soil.
- Steep dirt ascents: Pushing your weight uphill demands total trust in your poles. Carbide will not blow out backward when you double down on an incline.
If you have joint concerns or balance issues, trusting your pole placement is essential. While we share our walking experience freely, please talk with a physical therapist or your doctor if you deal with flexibility & mobility or balance conditions, as they can recommend specific weight-bearing limits tailored to your body.
How to Angle the Rubber Boot Correctly
Unlike trekking poles that are planted almost vertically in front of your body, Nordic walking poles strike the ground behind your body at roughly a 45-degree angle. This backward angle is what pushes you forward. Because of this angle, rubber paws are shaped like tiny boots with an angled toe and a distinct heel. If you put them on backward or twisted to the side, your poles will skip across the road like stones across water.
Orienting the paw takes just a moment when you build the habit. Follow these practical steps before you set out on a paved route:
- Find the tail of the boot: Look at the underside of the rubber paw. You will notice a rounded front and an elongated, flat back edge that flares out toward the rear.
- Align with the hand strap: Hold the pole up by its grip. Point the palm strap forward as if your hand were inside it. The elongated tail of the rubber paw must point backward, away from the direction you are facing.
- Check the squareness: Look down the length of the shaft from the grip to the ground. The paw should sit completely straight, in line with your arm swing, not turned inward toward your shins or outward toward the curb.
- Seat the ferrule fully: Push the paw firmly onto the plastic tip. Twist it a quarter turn while pushing until you feel the carbide tip hit the inner steel base plate. A half-seated paw will wobble and fly off mid-stride.
When you plant the pole correctly at that 45-degree angle, the flat sole of the paw makes full, flush contact with the asphalt. As your arm swings back and your hand opens to finish the push, the rockered toe rolls smoothly off the ground. If you hear a scuffing sound or feel the pole slipping out from under you, stop and look down. Nine times out of ten, the paw has twisted fifteen degrees out of alignment.
Storing Spare Tips in Your Pack
A typical walk often crosses multiple surfaces. You might start with half a mile of neighborhood sidewalks, duck into a nature reserve for two miles of dirt singletrack, and walk home along a paved greenway. That means you will need to take your paws off and put them back on mid-route. Loose rubber paws covered in road grit have an annoying habit of disappearing from pockets or staining clean gear.
We recommend keeping a dedicated pouch or clip system for your tips. An old zippered coin purse, a small silicone snack bag, or a nylon accessory pouch clipped to your waist pack works wonders. Put the dirty paws straight into the pouch the moment you take them off so grit does not end up in your jacket pockets or on your phone screen. Some poles also come with integrated click-on paw holders that clamp straight onto the upper shaft, keeping the paws within arm reach at all times.
Before putting rubber paws back onto the metal spikes after walking through wet dirt, take five seconds to inspect the tips. Tap the pole spikes against a rock or a tree root to knock off clumps of damp soil. If you press a rubber paw over a mud-caked metal spike, the grit acts like wet sandpaper inside the rubber sleeve. Over a few weeks, that trapped dirt grinds down the plastic ferrule, making the tip fit loosely until the paw falls off during normal walking.
Signs That Your Tips Need Replacement
Both rubber paws and carbide spikes are consumable wear items. Walking several times a week means you will wear through them eventually. Keeping an eye on their condition ensures you always get reliable push-off without damaging your pole shafts or jarring your joints.
For rubber asphalt paws, check the bottom tread every few weeks. They start with distinct tread channels designed to channel away surface water. Once the tread grooves wear completely flat and the paw becomes slick, wet asphalt traction drops fast. More critically, check the bottom for pinholes or circular bulges. When the internal steel washer wears through, the carbide tip will press directly against the thin rubber outer wall. The moment you see the gray tip poking through the bottom, throw the paws away and install a fresh pair. Continuing to walk on blown-out paws will grind your metal spike down against the road.
Carbide tips last much longer, but they are not indestructible. Check your metal tips for these three issues:
- Rounded edges: A fresh carbide tip has crisp, sharp borders that catch your fingernail. After hundreds of miles on hard dirt and rocks, the point can wear down into a smooth, rounded dome that slips on packed earth.
- Chipped or fractured metal: Sintered carbide is hard but brittle. If a tip jams into a tight crevice between granite rocks and bends under sideways force, a chunk of the metal can shear off.
- Loose ferrule collars: Grasp the plastic housing that holds the metal spike and try to twist it. It should be rock-solid. If the housing wobbles on the carbon or aluminum shaft, the glue has failed, and the tip assembly needs to be reset or replaced.
Most dedicated walkers go through two to three pairs of rubber paws each year if they walk on pavement three times a week. Carbide tips, by contrast, typically last several years before the entire lower ferrule requires replacement.
Common Mistakes to Avoid
Even seasoned walkers fall into small habits that wear gear out early or make walking harder than it needs to be. Here are the most frequent slip-ups we see on the trails:
- Leaving rubber paws on inside muddy parks: This leads to constant slipping, wasted upper-body energy, and paws sucked off into deep mud.
- Pushing down at a trekking angle: Planting rubber paws vertically in front of your feet instead of angled behind your stride prevents the flat rubber surface from contacting the ground, causing the paw to skid forward.
- Buying unreinforced generic pads: Ultra-cheap generic rubber tips from big-box online retailers often skip the internal metal washer. Your spikes will pierce them within two miles.
- Ignoring left-and-right orientation: Many paw designs are molded specifically for the left or right side with subtle curvature. Check the underside for small "L" and "R" stamps before pressing them on.
Putting It into Practice
The best way to get comfortable with your pole tips is to practice swapping them during your next walk. Before you head out the door, take a minute to inspect what is currently on the bottom of your poles. Check that your rubber paws are turned with the tails pointing straight back, and pull them off once just to verify that the carbide spike inside is seated against a sound steel washer.
When your route shifts from concrete to dirt this week, do not hesitate to stop for thirty seconds. Slip the rubber paws off, stow them in your pocket or pack pouch, and feel how the carbide spike engages the soil. Pay attention to how your posture straightens up and how much easier it becomes to drive your arms back. When the trail ends and the road begins again, pop the paws back on, align the tails, and carry on smoothly. With just a little attention to the ground beneath your poles, your walks will feel lighter, quieter, and far more rewarding.